The Insert tab is located next to the Home tab on the right side. For the most part, the Insert tab revolves around, well, inserting things, and modifying them to however you wish.
I'll show you how to insert table, picture, clipart, shapes, header and footer.
1. TABLE
A table is a grid of cells arranged in rows and columns. Tables can be customized and are useful for various tasks such as presenting text information and numerical data.
To insert a blank table:
a. Select the Insert Tab.
b. Click the Table icon.
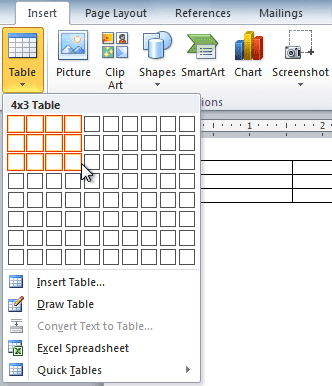 c. Hover your mouse over the diagram squares to select the number of columns and rows in the table.
d. Click your mouse, and the table appears in the document.
e. You can now place the insertion point anywhere in the table to add text.
2. PICTURES AND CLIP ARTS
Images are a great way to liven up a document, and Word offers a few methods to insert them. There are built-in clip art images for just about every topic, so you may be able to find a perfect clip art image for your document. If you have a more specific image in mind, you can insert a picture from a file.
To insert a picture from a file:
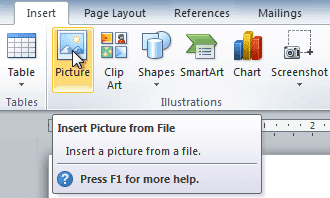 a. Select the Insert tab.
b. Click the picture icon in the Illustrations group.
c. The Insert Picture dialog box appears.
d. Select the desired image file, then click Insert to add it to your document.
Note: To resize an image, click and drag one of the corner sizing handles. The image will change size while keeping the same proportions. If you want to stretch it horizontally or vertically, you can use the side sizing handles.
Next is inserting clip art.
To insert a clip art:
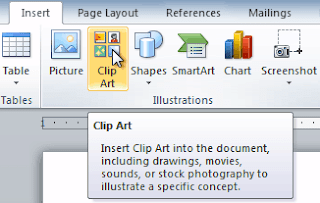
a. Select the Insert tab.
b. Click the Clip Art icon in the Illustrations group.
c. The clip art options appear in the task pane to the right of the document.
d. Enter keywords in the Search for: field that are related to the image you want to insert.
e. Deselect any types of media you do not want to see.
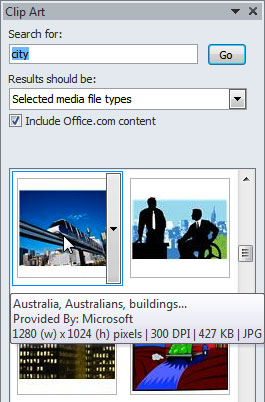
f. Click Go.
g. Click an image in the Clip Art pane. It will appear in the document or You can also click the drop-down arrow next to the image to view more options and click 'Insert'.
3. SHAPES
You can add a variety of shapes to your document, including arrows, callouts, squares, stars, and flowchart shapes. Want to set your name and address apart from the rest of your resume? Use a line. Need to create a diagram showing a timeline or process? Use flowchart shapes.
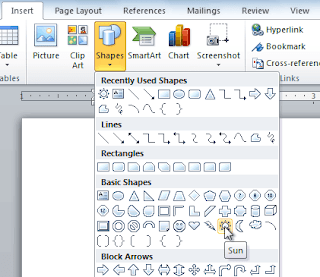 To insert a shape:
a. Select the Insert tab.
b. Click the Shapes icon in the Illustrations group.
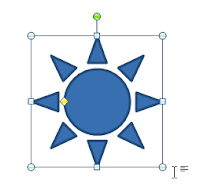 c.Select a shape from the drop-down menu.
 d. Click and drag the mouse until shape is the desired size.
e. Release the mouse button.
4. HEADER AND FOOTER
You can make your document look professional and polished by utilizing the header and footer sections. The header is a section of the document that appears in the top margin, while the footer is a section of the document that appears in the bottom margin. Headers and footers generally contain information such as the page number, date, and document name.
To insert a header or footer:
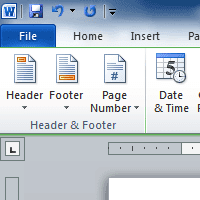
a. Select the Insert tab.
b. Click the Header or Footer icon. A drop-down menu will appear.
c. From the drop-down menu, select Blank to insert a blank header or footer, or choose one of the built-in options.
d. When you're finished, click Close Header and Footer or hit Esc key.
Note: After you close the header or footer, it will be visible, but it will be locked. To edit again, just double-click anywhere on the header or footer, and it will become unlocked.
So tables, pictures, clip arts, shapes, header and footer are the basic icons in the Insert tab menu. We have so many icons in the Insert Tab and in my next post, you can check it out.
For now, if you have questions, just comment below! Thank you.


26 comments
Write commentsWhat is the use of SMARTART in insert tab?
Replywhat does cross-references do?
ReplyCan I insert water mark using insert tab?
ReplyWhat are the image formats/extensions I can possibly insert in my document? Is there specific image formats I can insert? Or any image format will do?
ReplyThere are image formats/extensions we commonly used in inserting picture in our document like JPEG, PNG, and GIF. But there are many image formats that Microsoft Word can handle like EMF, WMF, BMP, EMZ, WMZ, TIFF, EPS, and WPG. All of these image formats are compatible to Windows. To answer your question, any image format will do but make sure it is compatible to your word processing software like Microsoft Word.
ReplyIn MS Word 2002, the watermark option is in the Format Tab -> Background -> Printed Watermark. In MS Word 2007 and 2010, the watermark option is located at Page Layout under the section of Page Background. And in the MS Word 2013, the watermark option is in the Design Tab under the section of Page Background. So to answer your question, you can't use Insert Tab in inserting watermark in your document unless you are going to make a picture watermark.You are going to insert a picture that is transparent then wrap text then choose 'Behind Text'. You have now a picture watermark using Insert Tab.
ReplyCan I insert table I want? I mean can I customize the table I made? How?
ReplyIf you want to customize your table you made: first, insert your table with your desired number of columns and rows. Then after you inserted a table, there is another tab appear in the Ribbon Tab which is Design Tab and Layout Tab under Table Tools Category. In the Design tab, you'll be able to customize your table to be any way that you'd like. This includes the style, color, borders, and the line style and weight. You can also draw new tables and erase them.So this is the way on how to customize your table.
Replymam, is it possible to convert text to table here in MS word? if yes, how?
ReplyHi Ma'am Daisy! Is there any difference between the insert tab of Microsoft Word 2010 and Microsoft Word 2007? Thank you in advance.
ReplyHi Eduard! Yes it is possible to convert text to table here in MS Word.
ReplyFirst, type the text you want to placed in the table and highlight it in order to convert.
On the Insert Tab, click Table then select Convert Text to Table.
In the Convert Text to Table dialog box, under Separate text at, click the option for the separator character that is in your text.
In the Number of columns box, check the number of columns. If you don't see the number of columns that you expect, you may be missing a separator character in one or more lines of text.
Select any other options that you want.
Cross-references are commonly used in indexes and within long documents to direct the reader's attention to another part of the document, such as an image or related table. A cross-reference created in Word can be automatically updated if you later make changes to the document.
ReplySmartArt is another option in Insert Tab. It is basically a way to make organized presentation art. It is suitable for "organizational" types of artwork, such as org charts and process lists, flowcharts, cycle etc.It allows you to visually communicate information rather than simply using text. Illustrations can make an impact in your document, and it makes using graphics especially easy.
ReplyHi Christine! If you are going to see the Insert Tab of Microsoft Word (MS WORD)2010 and Microsoft Word (MS WORD) 2007, there is only one difference. MS WORD 2010 has a Screenshot Icon while MS WORD 2007 doesn't have Screenshot Icon.
ReplyHere is the link for the Insert Tab in MS WORD 2010: http://www.znanje.org/ebooks/wordMMXEngl/01/03_ribbon_insert_tab11.JPG
Here is the link for the Insert Tab in MS WORD 2007: http://ww3.templejc.edu/prodev/images/common/word2007-insert-tab.jpg
Can I made or customize a Clip art?
ReplyHi Karen! Yes you can make your own clip art but not in the Microsoft Word Office.You are going to use Microsoft Clip Organizer under Microsoft Office 2010 Tools. To find it, go to Microsoft Office Group in your All Programs menu, select the Microsoft Office 2010 Tools > Microsoft Clip Organizer.Select the images that you want to be as a clip art and click Add. They’ll be added automatically to your clip organizer.
ReplyMa'am is it possible to add my current tables in excel inside the Microsoft Word?
ReplyHi Alyssa! Yes it is possible to add tables from Excel to the Word. Simply open your Word document and put the cursor at the desired location for the table. Then,open the Excel document, highlight the area of the spreadsheet you want to copy, right click to "copy", and then "paste" into your Word document. This will create a table of the information in your word document. Note that when you "paste" the selection into Word, if you right click to enable the paste, instead of just using CTRL V, you'll have the option of selecting the style of selection to match the original, or match the Word document style.
ReplyMaam Daisy can I customize my header and footer?
ReplyHi Alyssa! Yes, you can customize your header and footer in the Design Tab. First, click either the Header or Footer command. A drop-down menu will appear. From the drop-down menu, select Blank to insert a blank header or footer, or choose one of the built-in options.The Design tab will appear on the Ribbon, and the header or footer will appear in the document.Type the desired information into the header or footer.When you're finished, click Close Header and Footer in the Design tab, or hit the Esc key.
ReplyHi Ma'am :) Is it possible to copy the contents in each cell of table in MS Word and paste in to the same cell in MS Excel?
ReplyHi Lourdes! Yes it is possible to copy the contents in each cell of table in MS Word and paste it in the same cell in MS Excel. How? First, make a table in MS Word, highlight it and then copy or press Ctrl + C. Go to your MS Excel and then click one cell then paste it or press Ctrl + V.
ReplyMaam . Is there any short cut key to resize pictures?
ReplyHi Jolina! Resizing a picture is easy when you used a mouse. But if you want to use a keyboard, you can use Shift + Arrow Key to resize the picture. The up and down keys will increase and decrease the height of the object and the left / right keys control the width. If you want to rotate your picture, you can use Alt + Left / Right Arrow keys to rotate the shape or picture in 15 degree increments.
Replyhi Ma'am Daisy, is it possible to make SmartArt using shapes and symbol? I'm just curious!!
ReplyHi Genet! Yes it is possible to make SmartArt using shapes and symbol. Just insert shapes and then create your own SmartArt depends on your wanted design.
ReplyConversionConversion EmoticonEmoticon